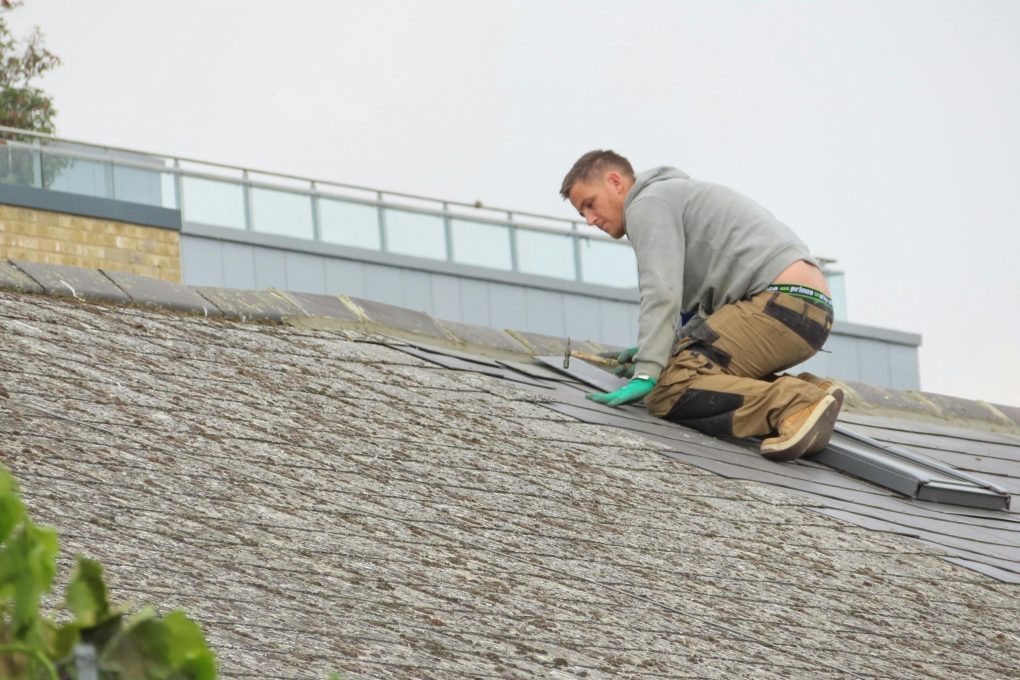
Storms can leave more than just puddles and fallen branches behind—they can do serious damage to your roof. Whether it’s missing shingles, exposed underlayment, or water leaks making their way indoors, roof damage is a stressful situation for any family. But here’s the good news: if you’re comfortable on a ladder and willing to follow some safety steps, installing roof shingles after a storm is a manageable DIY project.
This guide will walk you through how to install roof shingles after a storm damages your roof—step by step. We’ll also cover how to inspect the damage, when to call a roofing professional, and how to keep your roof storm-ready for the future.
First Things First: Is It Safe to Start Repairs?
Before learning how to install roof shingles after a storm, safety has to come first. Climbing onto a roof isn’t something to take lightly, especially after high winds or heavy rain.
Ask yourself these key questions:
- Is the storm completely over? Never climb a roof during or directly after a storm.
- Is the roof dry? A wet roof is extremely slippery and dangerous.
- Are there signs of structural damage? If parts of the roof look saggy, broken, or unstable, skip the DIY and call a roofing professional.
- Do you have the right equipment? You’ll need sturdy shoes, gloves, a harness, and a safe ladder setup at the very least.
If you answer “yes” to all safety questions and the damage appears localized (a few missing or loose shingles), you’re likely a good candidate for a DIY fix.
Step 1: Assess the Roof Damage

Before you learn how to install roof shingles, you need to understand where and how the storm affected your roof.
Here’s what to look for:
- Missing shingles (you may find them in your yard)
- Lifted or curling shingles that weren’t torn off but may be loose
- Exposed underlayment or roof decking
- Nail holes or spots where water might enter
- Leaks or water stains in your attic or ceiling
Take photos of the damage for documentation—especially if you plan to file a homeowners insurance claim. This can help you get reimbursed for materials or even labor if you end up needing help.
Step 2: Gather Your Materials
Here’s a basic list of what you’ll need to install roof shingles:
Tools:
- Hammer or roofing nail gun
- Pry bar or flat bar
- Utility knife
- Roofing shovel (optional but helpful for removing old shingles)
- Ladder and safety harness
- Chalk line (for alignment)
Materials:
- Replacement shingles (match the color and style as closely as possible)
- Roofing nails
- Roofing cement or adhesive
- Roofing felt or underlayment (if replacing damaged sections)
- Flashing (if damage occurred near edges or joints)
Tip: Most home improvement stores sell shingles by the bundle. One bundle typically covers about 33 square feet.
Step 3: Remove Damaged Shingles
Now it’s time to remove the old, broken, or missing shingles so you can install new ones properly.
Follow these steps:
- Lift the shingles above the damaged ones. Use a pry bar to gently loosen the shingle above the one you’re replacing. This exposes the nails.
- Remove the nails. Pull out the nails holding the damaged shingle in place.
- Slide out the broken shingle. Be careful not to damage neighboring shingles during the process.
- Inspect the underlayment. If it’s torn, wet, or soft, you’ll need to replace it too before installing new shingles.
Step 4: Install New Underlayment (If Needed)
If your roof decking or underlayment was exposed to water, it’s essential to replace that first before installing new shingles.
To install new underlayment:
- Cut a piece of roofing felt or synthetic underlayment slightly larger than the area you’re repairing.
- Lay it flat over the exposed roof decking.
- Nail or staple it in place, overlapping the edges with the existing underlayment.
Now your roof is ready for new shingles.
Step 5: How to Install Roof Shingles the Right Way
With the damage removed and the area prepped, it’s time to install your new roof shingles. Accuracy and overlap are key here—this is what keeps rain out and durability in. Here’s how:
1. Slide the New Shingle into Place
Start by gently sliding your replacement shingle into the gap where the damaged one used to be.
- Make sure it aligns perfectly horizontally with the surrounding shingles.
- The bottom edge of your new shingle should line up with the other shingles in that row.
- Ensure that the adhesive strip (sealant strip) faces upward and is positioned so the shingle above can bond to it.
Tip: If you’re replacing multiple shingles, work from bottom to top and right to left, just like the original installation. This ensures proper overlap and water runoff.
2. Nail It Down Securely
Use galvanized roofing nails (typically 1¼ inches long) that resist rust and corrosion.
- For three-tab shingles, place four nails per shingle: one about 1 inch in from each end, and two evenly spaced in the center.
- Nails should be driven just below the adhesive strip, but not so deep that they cut into the shingle.
- Nails should be flush with the shingle surface—not sticking up, and not sunk too deep.
For high-wind areas, consider using six nails per shingle for extra hold.
3. Apply Roofing Cement for a Strong Seal
If it’s cool outside (below 70°F), the adhesive strips on shingles may not bond properly on their own. In these cases, you’ll need roofing cement to keep everything secure.
- Lift each tab on the new shingle.
- Use a caulking gun or roofing cement tube to apply a quarter-sized dab under each tab.
- Press down firmly to bond the shingle in place.
Tip: Don’t overdo the cement—just enough to help the tabs adhere without causing seepage or lumps under the shingle.
4. Re-Nail the Shingles Above
In order to remove the damaged shingle, you probably had to lift or partially detach the shingle directly above it. Now it’s time to secure that shingle back in place.
- Re-insert any nails you removed from the overlapping shingle.
- Add a small amount of roofing cement under the lifted corners or tabs if they don’t lay flat.
- Press them down so they reseal to the new shingle below.
Pro Tip: Gently tap with a hammer to reseat lifted nails, but don’t crack the shingle. If a tab is too brittle or curls upward, replace that shingle too.
5. Check for Alignment
Whether you’re replacing one shingle or a whole section, keeping your rows straight is critical—not just for appearance, but for waterproofing.
- Use a chalk line or straight edge to verify that the bottom edges of your shingles stay level.
- Measure vertically from the eaves (bottom edge of the roof) to make sure each new row matches the original spacing, which is usually about 5 inches of shingle exposure per row.
- If you see a misaligned shingle, remove it before the sealant bonds and adjust accordingly.
6. Repeat the Process
Continue this repair process across all the damaged areas:
- Slide in a new shingle
- Nail it properly
- Add sealant as needed
- Re-secure surrounding shingles
- Check for alignment
Once all replacement shingles are in place, do a final inspection of your work:
- Are all nails fully seated and covered?
- Are there any lifted tabs or cracks?
- Are the shingle rows visually straight from ground level?
Taking a few extra minutes at this stage can save you from future leaks.
What If the Damage Is Widespread?
Sometimes, storms do more than knock off a few shingles—they cause large-scale damage that spreads across the entire roof. If:
- More than 25% of your shingles are missing,
- You have structural damage,
- The decking feels soft or unstable underfoot, or
- You notice multiple interior leaks…
Then a full roof replacement may be necessary. In that case, it’s usually best to get a professional roofing contractor involved. Your insurance may help cover some or all of the cost if you act quickly.
Should You File an Insurance Claim?
If the storm that damaged your roof was severe (hail, wind, or tree impact), your homeowner’s policy may cover repairs or replacement.
Here’s what to do:
- Document the damage with photos and videos
- Keep receipts for materials or contractor estimates
- File your claim ASAP—many insurers have tight deadlines
- Ask for a roof inspection from an adjuster before making major changes
You can still install temporary shingles or tarp sections of the roof while waiting for an adjuster. Just make sure not to discard damaged materials until they’re inspected.
Tips for Families Tackling DIY Roofing
If you’re doing the job with help from family members or teaching your older kids about basic home repairs, here are a few helpful tips:
- Assign roles. Have someone stay on the ground to hand up tools and materials.
- Keep kids and pets away from the work area to avoid falling debris or accidents.
- Take frequent breaks. Roofing is hot, tiring work—especially in summer.
- Double-check your work. One poorly placed nail can lead to a leak later on.
- Clean up carefully. Nails and shingle scraps can be dangerous in yards or driveways.
How to Keep Your Roof Storm-Ready in the Future

Once you’ve repaired your roof, it’s a good idea to make a plan to prevent future storm damage—or at least minimize it.
Preventive tips:
- Inspect your roof twice a year, especially before storm season.
- Trim nearby trees to reduce the risk of falling branches.
- Secure loose shingles with roofing cement as soon as you spot them.
- Clean your gutters regularly to prevent water backup and ice dams.
- Consider impact-resistant shingles if you live in an area prone to hail or hurricanes.
The more you maintain your roof, the longer it will last—and the fewer emergency repairs you’ll need after every big storm.
When to Call a Roofing Professional
While DIY roof shingle repair can be a money-saver, it’s not always the best option for every family.
Call a pro if:
- You feel unsafe climbing the roof
- You don’t have the right tools or equipment
- The damage is large-scale or spreading
- You’re unsure about how to match your existing shingles
- You suspect damage to the roof structure or attic
A good roofer can complete the job quickly, help you handle insurance, and give you peace of mind—especially after a stressful storm.
In Closing
Storms are part of life—but roof damage doesn’t have to lead to long-term stress. Learning how to install roof shingles after a storm damages your roof can help you take control of the situation, protect your home, and save money in the process. Whether you replace one shingle or dozens, every fix adds strength back to your home’s first line of defense.
Take it one step at a time, stay safe, and know that with the right tools and knowledge, your family can weather any storm.